Installing ceiling lights may seem like a daunting task for beginners, but fear not! This beginner’s guide will equip you with all the necessary knowledge and step-by-step instructions to successfully install ceiling lights in your home. From choosing the right type of light fixture to understanding the electrical wiring, this article will demystify the process and empower you to brighten up your living space with ease. So, put on your DIY hat and get ready to transform your ceilings into shining focal points of your home! Installing a ceiling light may seem like a daunting task, but with the right planning, preparation, and tools, it can be a manageable DIY project. In this comprehensive guide, we will take you through each step of the installation process, from planning and preparation to testing and finishing. So, grab your tools and let’s get started on illuminating your space!

Step 1: Planning and Preparation
Before embarking on any project, it is crucial to plan and prepare properly. This step ensures that you have a clear understanding of what needs to be done and helps prevent any hiccups along the way.
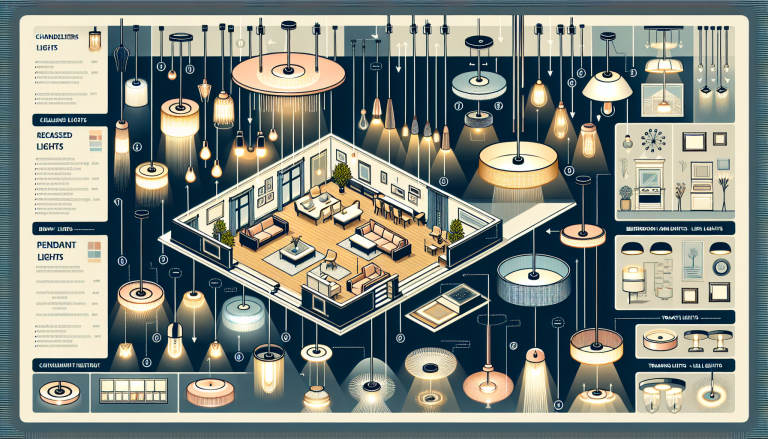
Determine the type of ceiling light
The first step in planning is to determine the type of ceiling light you want to install. Whether you prefer a classic chandelier or a modern pendant light, understanding your lighting aesthetic will guide your purchasing decisions.
Decide on the location
Once you have chosen the type of ceiling light, you need to decide on the location. Consider the purpose of the lighting and how it will fit into your room’s layout. If you’re unsure, it can be helpful to consult an interior designer or an electrician for their expertise.
Check electrical connections and wiring
Before starting the installation, it is essential to check your existing electrical connections and wiring. Ensure that your electrical system can handle the new ceiling light and make any necessary upgrades.
Ensure proper safety precautions
Lastly, it is vital to prioritize safety throughout the installation process. Turn off the power, use a voltage detector to verify it’s off, and wear appropriate protective gear such as safety goggles and gloves.
Step 2: Gathering Tools and Materials
Once you have planned and prepared for your ceiling light installation, it’s time to gather the necessary tools and materials. Having everything on hand will make the process smoother and more efficient.
Ceiling light fixture
Of course, you will need a ceiling light fixture that suits your style and lighting needs. Make sure to choose a quality fixture that will last.
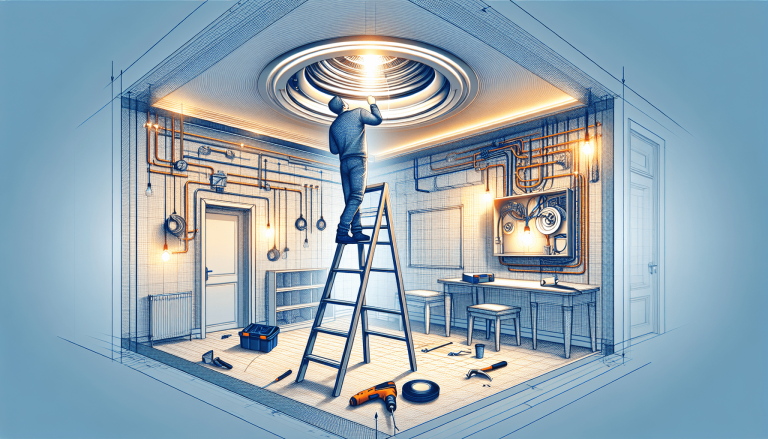
Ladder
A sturdy ladder is crucial for reaching the ceiling safely. Ensure that it is the right height for your installation needs and is stable on the ground.
Electrical tester/voltage detector
An electrical tester or voltage detector is an essential tool for checking the presence of electrical current. This will provide you with peace of mind knowing the power is off before working on the wiring.
Wire connectors
Wire connectors are used to join and secure electrical wires together. Depending on the existing wiring and the new fixture, you may need different sizes and types of connectors.
Screwdriver
A screwdriver is a versatile tool that you will need to remove the existing fixture, attach the mounting bracket, and secure the new fixture.
Wire stripper
A wire stripper is used to remove the insulation from the electrical wires. It ensures a clean and proper connection.
Pliers
Pliers are handy for manipulating and tightening wires and connectors. They provide a good grip and better control.
Electrical tape
Electrical tape is used to insulate and protect electrical connections. It ensures safety and prevents any wiring mishaps.
Wire nuts
Wire nuts are essential for securely connecting wires together. They provide a reliable connection and prevent any loose connections.
Step 3: Turning off the Power
Safety should always be the top priority when dealing with electrical work. Before starting any installation, make sure to turn off the power.
Locating the correct circuit breaker
Locating the correct circuit breaker is crucial to turn off the power to the specific area where you will be working. Consult your electrical panel and identify the breaker that corresponds to the room you are working in.
Switching off the power
Once you have located the correct circuit breaker, switch it off to cut off the power supply to the room. This step ensures that no electrical current is present during the installation process.
Using the voltage detector to verify power is off
Even after turning off the power, it is vital to double-check to ensure there is no residual electrical current. Use a voltage detector to verify that the power is indeed off before proceeding with any work.
Step 4: Removing the Existing Fixture
With the power turned off and verified, you can begin removing the existing ceiling light fixture.
Turning off the existing light switch
Before removing the fixture, make sure to turn off the existing light switch to prevent any accidental power supply.
Removing the light bulb and shade
Start by unscrewing and removing the light bulb and shade from the existing fixture. This step ensures easy access to the mounting screws.
Removing the mounting screws
Using a screwdriver, carefully remove the mounting screws that hold the existing fixture in place. Keep these screws aside as they may be needed for your new ceiling light installation.
Disconnecting the wiring
Once the mounting screws are removed, disconnect the wiring that connects the existing fixture to the electrical box. Take note of how the wires are connected for future reference.

Step 5: Installing the New Ceiling Light
Now that the old fixture is removed, it’s time to install your new ceiling light. Follow these steps for a successful installation.
Reading and following the manufacturer’s instructions
Every ceiling light fixture is different, so it’s important to read and follow the manufacturer’s instructions carefully. They will provide you with specific steps and guidance for your particular fixture.
Attaching the mounting bracket to the electrical box
Start by attaching the mounting bracket to the electrical box in the ceiling. Use the screws provided with your fixture or the ones you saved from the old fixture, ensuring that it is securely fastened.
Connecting the wires
Refer to the notes you made when disconnecting the old fixture’s wiring and connect the corresponding wires from the new fixture. Use wire nuts to secure the connections and ensure they are tight.
Securing the light fixture to the mounting bracket
Once the wires are connected, carefully align the holes on the light fixture with the screws on the mounting bracket. Insert the screws and tighten them to securely attach the fixture to the bracket.
Installing the light bulb and shade
Finish off the installation by inserting the light bulb and attaching the shade or cover. Make sure everything is properly aligned and tightened.
Step 6: Testing and Finishing
With the new ceiling light installed, it’s time to test and make any final adjustments.
Turning on the power
After completing the installation, you can turn the power back on by switching on the circuit breaker. This will restore electricity to the room.
Testing the new ceiling light
With the power on, test your new ceiling light by turning on the light switch. Ensure that it illuminates correctly and functions as expected.
Making final adjustments
If you notice any issues or discrepancies, make any necessary adjustments to ensure that everything is in proper working order. This may include tightening connections or repositioning the fixture.
Cleaning up and disposing of old materials
Finally, clean up your work area and dispose of any old materials properly. This will leave your space clean and ready to enjoy your new ceiling light.
Common Mistakes to Avoid
To ensure a successful ceiling light installation, avoid these common mistakes.
Skipping the planning and preparation stage
Planning and preparation are crucial steps that should not be overlooked. They lay the foundation for a smooth installation process.
Not turning off the power before starting work
Failure to turn off the power can lead to serious injuries or electrical damage. Always take the necessary precautions and double-check that the power is off before beginning any work.
Incorrectly connecting the wiring
Properly connecting the wiring is essential for the safe functioning of your ceiling light. Follow the manufacturer’s instructions and make sure to double-check your connections.
Not properly securing the light fixture
A loose or wobbly light fixture can be dangerous. Take the time to securely attach the fixture to the mounting bracket to prevent any accidents.
Tips for Success
Here are some additional tips to ensure a successful ceiling light installation.
Choose a ceiling light that complements your room’s decor
Consider the style and theme of your room when choosing a ceiling light. It should seamlessly blend in with your existing decor.
Ensure adequate lighting for the space
Before deciding on a specific ceiling light, assess the lighting needs of the room. Make sure the chosen fixture provides sufficient lighting for your specific space.
Consider using dimmable bulbs for versatility
To create ambient lighting and adjust the brightness according to your needs, consider using dimmable bulbs in your ceiling light fixture.
Label and organize wires before disconnecting
To avoid confusion when reconnecting the wiring, label and organize the wires before disconnecting them. This simple step will save you time and frustration.
Test the new ceiling light before fully installing
Before securing the new fixture completely, test it out to ensure it functions correctly. This will save you from any potential issues or need for reinstallation later on.
When to Call a Professional
While installing a ceiling light can be a manageable DIY project, there are instances when it’s best to call a professional.
If you are uncomfortable working with electricity
Working with electrical systems can be dangerous, especially if you have limited experience. If you feel uncomfortable or unsure, it’s best to leave the installation to a professional electrician.
If there are complex electrical issues
If your wiring or electrical system is outdated or poses complex issues, it’s advisable to consult a professional. They have the expertise to handle intricate electrical problems safely.
If you require a permit for the installation
In some jurisdictions, you may require a permit for electrical installations. If this is the case, it’s best to hire a licensed electrician who can handle any necessary permits and ensure compliance with local regulations.
Conclusion
Installing a ceiling light can be a rewarding and manageable DIY project for beginners. With proper planning, preparation, and following the outlined steps, you can safely and successfully install a ceiling light in your home. So, gather your tools, select the perfect ceiling light fixture, and make your space shine with beautiful and functional lighting.