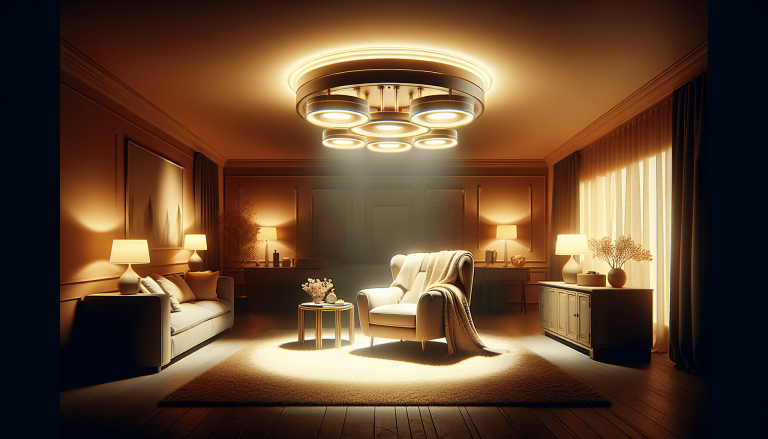
Have you ever admired the elegance and glamour of a chandelier and wished to have one illuminating your space? Well, you’re in luck! In this article, we will guide you through the process of installing a chandelier as a ceiling light. From choosing the right location to properly wiring and hanging the fixture, we will provide you with all the necessary steps to bring a touch of sophistication to your home. So grab your tools and let’s get started on transforming your space into a dazzling haven!
Table of Contents
ToggleGather the Necessary Tools and Materials
Installing a chandelier as a ceiling light may seem like a daunting task, but with the right tools and materials, you’ll be able to do it easily. Before you begin, make sure you have the following items:
Chandelier
First and foremost, you’ll need a chandelier of your choice. Consider the design, size, and style that will complement your room perfectly. Take measurements of the area where the chandelier will be installed to ensure it fits appropriately.
Ceiling Box
A ceiling box is necessary to provide support for your chandelier. Make sure it is compatible with the weight and dimensions of your chandelier. It should be able to handle the load without any risk of falling.
Wire Connectors
Wire connectors are essential for fastening and securing the connections between the chandelier wires and the house wires. These connectors ensure a safe and reliable connection while preventing any electrical hazards.
Wire Stripper
A wire stripper is a useful tool for removing the insulation from the wires. It allows you to expose the bare wire ends, making it easier to connect the chandelier to the house wiring.
Screwdriver
You’ll need a screwdriver to remove screws, detach the existing light fixture, and secure the chandelier in place. Ensure the screwdriver fits the screws on both the light fixture and the mounting bracket of the chandelier.
Ladder
To safely install the chandelier, you’ll need a ladder that is the appropriate height for your ceiling. Make sure it is stable and secure before climbing. It’s always better to have someone assist you while working on a ladder for added safety.
Turn Off the Power
Safety should always be your top priority when working with electricity. Before starting any electrical work, it’s crucial to turn off the power supply to the room.
Locate the Circuit Breaker
The circuit breaker is usually located in the main electrical panel of your home. It’s important to know which breaker controls the power to the room where you will be installing the chandelier. Look for labels or markings that identify the specific circuit.
Turn Off the Power Supply to the Room
Once you’ve identified the correct circuit breaker, switch it off to cut off the power supply to the room. This ensures that there is no electricity flowing through the wires, minimizing the risk of electrocution or electrical accidents while you work.
Remove the Existing Light Fixture
Before you can begin installing the chandelier, you’ll need to remove the existing light fixture.
Turn Off the Light Switch
Make sure the light switch connected to the existing fixture is in the off position. This additional step ensures that the circuit is completely cut off and eliminates any possibility of accidental electrical shock.
Remove the Screws Securing the Fixture
Locate the screws that hold the existing light fixture in place. Using a screwdriver, carefully remove these screws to detach the fixture from the ceiling. Keep track of the screws as you may need them for securing the new chandelier.
Disconnect the Wires
Once the screws are removed, gently lower the fixture to access the wires. Take note of the wire colors and their connections. Using wire cutters or strippers, disconnect the wires by unscrewing the wire nuts or untwisting them. Remember to exercise caution to avoid any accidental contact with live wires.
Prepare the Ceiling Box
Before installing the chandelier, you need to ensure that the ceiling box is prepared and ready to provide support.
Ensure the Electricity is Turned Off
Double-check that the power supply to the room is still turned off. Even though you’ve turned off the circuit breaker, it’s important to be certain that there is no electrical current flowing.
Remove the Cover Plate
If there is an existing cover plate on the ceiling box, remove it carefully. This will expose the mounting bracket where you will install the chandelier.
Mount the Ceiling Box
Inspect the ceiling box and ensure it is securely fastened to the ceiling. If needed, tighten the screws to ensure stability. Verify that the weight rating of the ceiling box is suitable for the chandelier you are installing.
Prepare the Chandelier
Before connecting the chandelier to the wiring, it’s crucial to prepare it properly.
Read the Manufacturer’s Instructions
Every chandelier is different, and the manufacturer’s instructions provide valuable information specific to your model. Carefully read the instructions to understand the steps involved in assembling and installing your particular chandelier.
Assemble the Chandelier
Follow the manufacturer’s instructions to assemble the chandelier. This may involve attaching arms, decorative elements, and other components. Take your time to ensure each part is securely connected.
Attach the Mounting Bracket
The chandelier should come with a mounting bracket that needs to be attached to the ceiling box. Follow the manufacturer’s instructions to secure the bracket to the ceiling box using the provided screws.
Connect the Wiring
Now it’s time to connect the chandelier to the house wiring.
Strip the Insulation off the Wires
Using a wire stripper, carefully remove about 1/2 inch of insulation from the ends of the chandelier wires. This will expose the bare wire, allowing for a proper connection.
Connect the Chandelier Wires to the House Wires
Match the color-coded wires from the chandelier to the corresponding wires in the ceiling box. Twist together the exposed ends of the wires, ensuring a tight and secure connection. Once twisted together, cover the connections with wire nuts and screw them on until they are snug.
Secure the Connections with Wire Connectors
For added safety and to prevent any accidental disconnections, cover the wire nuts and connections with electrical tape. This will help keep them secure and protect against any potential issues that may arise from movement or vibration.
Hang the Chandelier
With the wiring complete, you can now hang the chandelier in its rightful place.
Lift the Chandelier onto the Mounting Bracket
Carefully lift the chandelier and hold it up to the mounting bracket. Align the holes on the chandelier’s mounting plate with the screws on the mounting bracket. Slowly lower the fixture, ensuring that it rests securely on the mounting bracket.
Secure it with Screws or Nuts
Using the screws or nuts provided by the manufacturer, tighten them into the holes on the mounting bracket and chandelier’s mounting plate. Make sure they are securely fastened but be cautious not to overtighten and damage the chandelier or mounting bracket.
Attach any Additional Components
If your chandelier has additional components, such as chains or decorative elements, now is the time to attach them. Follow the manufacturer’s instructions to ensure proper installation and secure any additional components firmly in place.
Install the Light Bulbs
No chandelier is complete without the light bulbs. Follow these steps to install the bulbs correctly.
Refer to the Chandelier’s Instructions
Different chandeliers have different requirements when it comes to light bulbs. Refer to the manufacturer’s instructions to determine the appropriate type and wattage of bulbs to use for your specific chandelier.
Select the Appropriate Light Bulbs
Choose light bulbs that not only fit the recommended specifications but also suit your lighting needs. Consider the brightness, color temperature, and energy efficiency of the bulbs to create the desired ambiance in your room.
Screw the Bulbs into the Sockets
Carefully insert each light bulb into the designated socket on the chandelier. Turn them clockwise until they are securely screwed in but avoid overtightening, as this can damage the sockets.
Test the Chandelier
Before finalizing the installation, it’s essential to test the chandelier to ensure it is working correctly.
Turn on the Power
Return to the circuit breaker panel and switch on the power supply to the room where the chandelier is installed. Ensure the power is flowing by checking that other electrical devices in the room are functioning.
Switch on the Light
Once you’ve confirmed that power is restored, switch on the light using the chandelier’s built-in switch or the light switch on the wall. If the chandelier doesn’t turn on, double-check the wiring connections and troubleshoot any potential issues.
Check that all Bulbs are Working Properly
Inspect each bulb to ensure they are all functioning correctly. Sometimes a bulb may not be properly installed or may need to be replaced. Replace any malfunctioning bulbs with new ones of the same type and wattage.
Finalize the Installation
Now that your chandelier is properly installed and tested, take the necessary steps to ensure everything is secure and tidy.
Tighten any Loose Screws
Inspect the chandelier and mounting bracket for any loose screws. Using a screwdriver, carefully tighten any screws that need attention. This will ensure the chandelier stays securely in place and prevent any potential wobbling or instability.
Reinstall the Cover Plate
If you removed a cover plate earlier, now is the time to reinstall it. Position it over the ceiling box, aligning it with the screw holes. Secure it in place using the screws provided with the cover plate.
Enjoy your Newly Installed Chandelier as a Ceiling Light
Congratulations! You have successfully installed a chandelier as a ceiling light. Step back, admire your handiwork, and bask in the beautiful illumination and elegance your new chandelier brings to the room. Now, you can enjoy the ambiance and sophistication this stunning lighting fixture adds to your space.

